Programming Task 6
Time Estimate: 7 hours
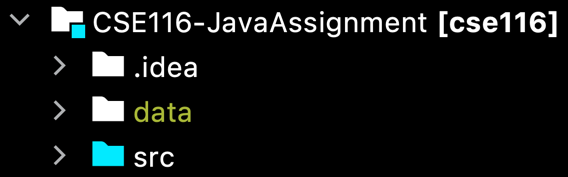
Project Structure
You will continue to add functionality to your existing project from the previous task. There is no new repository to clone.
Resources
In this task, you will work with real data related to songs and movies. You will create and store data files that you'll use in your tests in a directory named "data" in your top level project directory. We'll use 3 different resources to obtain data. You can/should use data from these files in your tests. You should create smaller files using this data.
songs.csv
Songs + Ratings: The songs.csv file contains songs and ratings [from students in Fall 2023] as a CSV file in the format "songID,artist,title,reviewerID,rating".
movies.csv
Raw data downloaded from - https://www.kaggle.com/datasets/rounakbanik/the-movies-dataset?resource=download Copyright - CC0: Public Domain
Movies: The movies.csv file contains data for 4575 movies. The format of the file is "movieTitle,castMember0,castMember1,castMember2,etc." where there can be any number of cast members (There must be at least 1 cast member for every movie in the file).
movie_ratings.csv
Movie Ratings: The movie_ratings.csv file contains ratings for movies by title in the format "title,reviewerId,rating".
Specification
In this task, you will implement the following specs related to reading files matching the formats from the resources section to populate data structures of Songs and Movies.
Create a FileReader class in the ratings package the following
static methods will be tested and implemented:
- A
staticmethod namedreadSongsthat takes aStringas a parameter and returns andArrayListofSongs-
The input
Stringis the name of a file to be read. This file will be a CSV file where each line matches the format from the songs.csv file: "songID,artist,title,reviewerID,rating" -
The method will return an
ArrayListofSongscontaining all of the information from the input file. If a song appears in the file more than once, this means that it has been rated by multiple reviewers. In this case, only one Song object should be returned for that song, and it should contain all the ratings for this song from the file -
If the input file does not exist, the method will return an empty
ArrayList -
The
Songsin the returnedArrayListmay appear in any order. Your tests must accept any order of the returnedSongs(This is much of the challenge in writing these tests) -
The ratings for each song must be added to the song in the order in which they appear in the
file. When
testing the linked list of
Ratingsfor a song, you can assume that they are in the same order in which they appear in the file (This will make it simpler to test the linked list)
-
The input
- A
staticmethod namedreadMoviesthat takes aStringas a parameter and returns anArrayListofMovies-
The input
Stringis the name of a file to be read. This will be a CSV file where each line matches the format from the movies.csv file that you can download above: "movieTitle,castMember0,castMember1,castMember2,etc" and there can be any number of cast members, but there must be at least one cast member per movie -
The method will return an
ArrayListofMoviescontaining all of the information from the input file -
If the input file does not exist, the method will return an empty
ArrayList -
The movies in the returned
ArrayListmay appear in any order. Your tests must accept any order of the returned movies (This is much of the challenge in writing these tests) -
The cast for each movie must be in the
ArrayListin the same order in which they appear in the line for that movie. You should assume this order when testing the castArrayLists(The capitalization of the cast names will be exactly as they appear in the file so there's no need to ignore case when comparing names)
-
The input
- A
staticmethod namedreadMovieRatingsthat takes anArrayListofMoviesand aStringas parameters. The method returns anArrayListofMovies-
The input
ArrayListofMovieswill containMovieobjects with their title and cast populated. These movies should not have any ratings added to them. When your program runs, it is intended for thisArrayListto be provided by yourreadMoviesmethod -
The input
Stringis the name of a file to be read. This will be a CSV file where each line matches the format from the movie_ratings.csv file that you can download above: "title,reviewerId,rating" -
The method will return an
ArrayListofMoviescontaining the movies from the inputArrayListalong with their ratings read from the input file. If a Movie from the inputArrayListdoes not have any ratings in the ratings file, it should not be included in the outputArrayList. If a movie has been rated that is not included in the inputArrayList, the rating should be ignored (eg. If you find a rating for a movie that is in the input, do not create aMovieobject for the rating) -
Movies will have unique titles. Any movies with identical titles have been removed
from the source data. Do not write tests where the input
ArrayListcontains multiple movies with the same title. Any ratings for movies with the same title should be treated as multiple ratings for the same movie -
If the input file does not exist, the method will return an empty
ArrayList -
The
Moviesin the returnedArrayListmay appear in any order. Your tests should accept any order of the returned movies -
The ratings for each
Moviemust be in the order in which they appear in the file. When testing the linked list ofRatingsfor aMovie, you can assume that they are in the same order in which they appear in the file (This will make it simpler to test the linked list)
-
The input
Testing Utilities
TestFiles: Create a class named TestFiles in the tests package and
write the following testing utility method in this class.
compareMovieArrayLists- Write a method namedcompareMovieArrayListsin thetests.TestFilesclass that:-
Takes [references to] 2
ArrayList<Movie>objects as parameters -
Checks if both
ArrayListscontain all the same movies (Same title, cast list, and ratings). The cast list and ratings must be in the same exact order in their respective data structures, but the movies can appear in any order in theirArrayListsThe method fails a JUnit assert if theArrayListsdo not contain exactly the same movies
-
Takes [references to] 2
Note: You may want to write a similar method to compare lists of songs, even though it's not required, as it may prove useful when writing tests for reading songs.
Testing Requirements
Write tests for the three methods (readSongs, readMovies, and
readMovieRatings) in the tests.TestFiles class.
For the testing in this task, you will create and use data files for your tests. All of your data files must be in a directory named "data" in the root of your project. For example, if you have a test file named "movies_test_1.csv", you should write a test with the filename "data/movies_test_1.csv" and it will open the correct file from your data directory.
Note: Do not add spaces in your testing filename. Use underscores like in the examples above if you want to use filenames with multiple words.
Programming Requirements
Implement the readSongs, readMovies, and
readMovieRatings static methods.
Autolab Feedback
The feedback in Autolab will be given in 4 phases. If you don't complete a phase, then feedback for the following phase(s) will not be provided.
- Testing your testing utility method
- Your testing utility method will be checked with a variety of test cases to ensure that it makes all the required checks. This phase will ensure that your utility method is accurate before you start using it in your tests
- Running your tests on a correct solution
- Your tests will be run against a solution that is known to be correct. If your tests do not pass this correct solution, there is an error somewhere in your tests that must be fixed before you can move on with the assignment. If your tests don't get past this check, you should re-read this document and make sure you implemented your tests and code according the specification. You should also make sure that if there are multiple correct outputs to the input in your tests cases that you accept any of the outputs as correct
- Checking your tests for feature coverage
- The next phase is to check if your tests check for a variety of features defined by different inputs. You should write at least one test case for each feature to pass this phase
- Passing this phase does not necessarily mean that your testing is completely thorough. Satisfying Autolab is the bare minimum testing requirement. Not all possible inputs are checked, and it is sometimes possible to pass this phase with weak testing. If you are struggling to earn credit for code that you believe is correct, you should write more than the required tests
- Running my tests on your solution
- Once Autolab is happy with your tests, it will run my tests against your code to check it for correctness. If your testing is thorough, and your code passes your tests, then you should pass this phase. If you pass your tests, but fail one of mine, it is an indicator that you should write more tests to help expose your bug
Once you complete all 4 phases, you will have completed this Task and Autolab will confirm this with a score of 1.0 for complete.